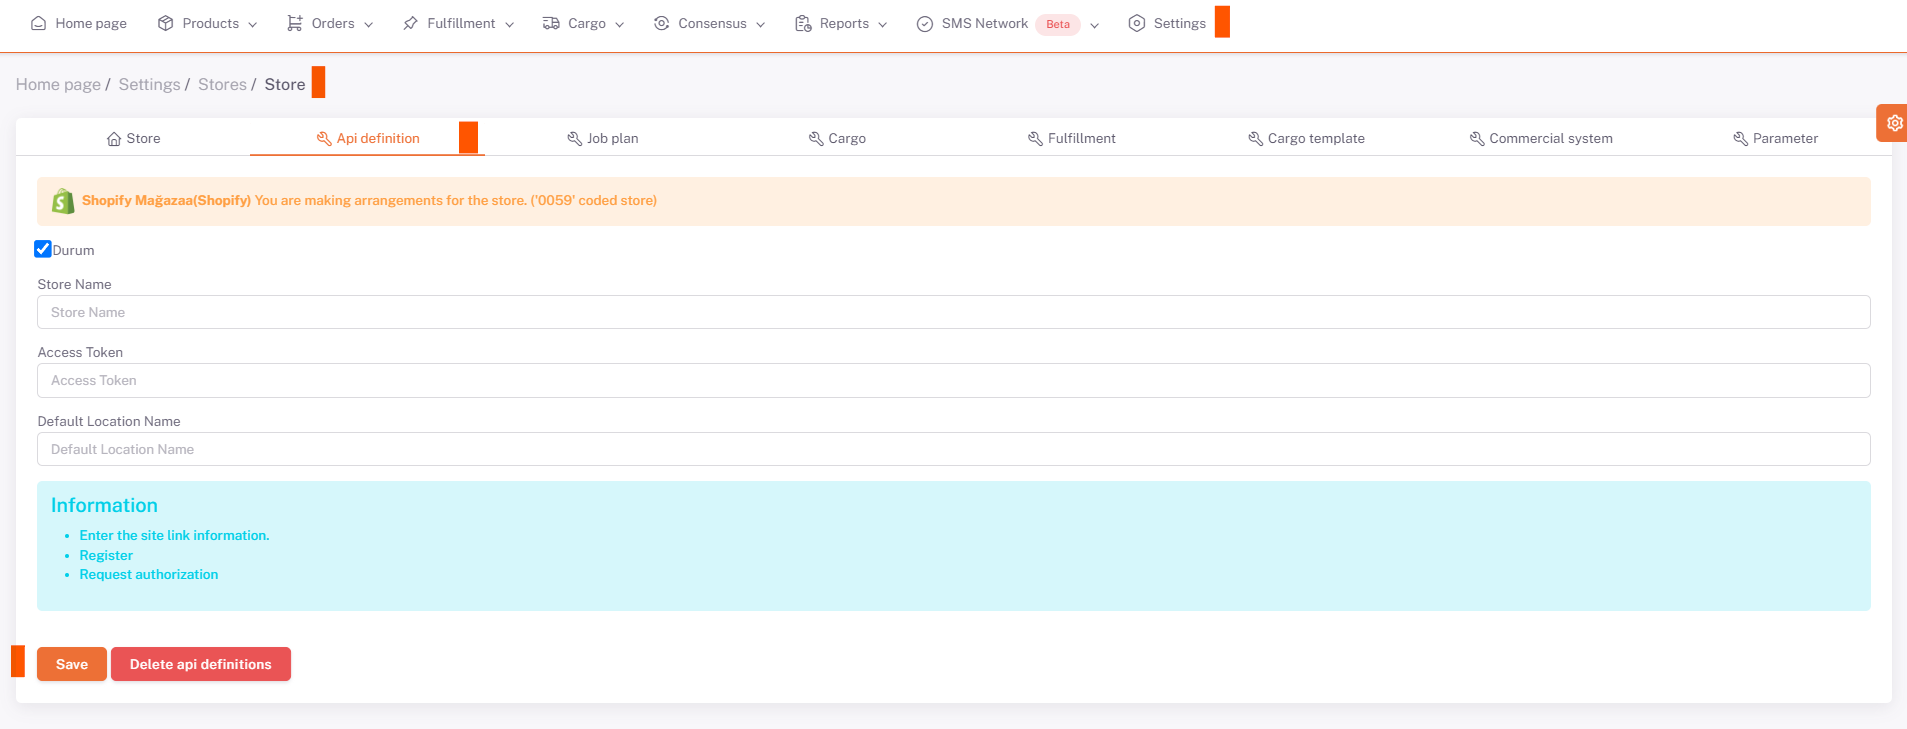
Shopify API Integration
We need to fill in the “Store Name” “Access Token” and “Default Location Name” information under the Settings > Stores > Shopify > API Definition field from the ShopiVerse panel.
To do this, click on the Settings button on the left on your admin.shopify.com page and select the warehouse definition under the "Locations" menu on the page that opens. You need to enter the "Name" information in the "Default Location Name**" field.
Under the Settings > Domain Name menu, we need to enter the domain name "xxxx" where the information xxxx.myshopify.com is located in the "Store Name" field in the ShopiVerse panel. Under the Settings > Applications and Sales Channels menu, you need to click "Create an Application" on the "Develop Application" button and write "ShopiVerse" in the "Application Name" section.
After this process, you need to click on the "Configure" button in the Configuration > Admin API integration section and tick all the boxes under the "Admin API Access Scopes" field on the page that opens. After this process, you need to select the “Event Version” field in the “Webhooks subscriptions” section at the bottom of the page as “2023-07” and save.
After this process, we go to the "API credentials" tab and click the "Install Application" button in the "Access Tokens" field and click Install in the pop-up that opens. Afterwards, you need to view and copy the Token information once and enter this code into the “Access Token” field in the ShopiVerse panel.
Settings

Stores > Shopify

Shopify > API Definition
